Showing posts with label Cooking. Show all posts

Thursday, October 18, 2012

Recipes From the Kitchen Drawer

As some of you know I used to post my weekly recipe, which has stopped, mostly because I am cooking something new everyday, (trying to make home grown veg and food budget ingredients more interesting), and I cant keep up with it all.
BBC Good Food is a great site by the way for recipe ideas.
 But today I thought I'd share a great book called, 'Recipes from the Kitchen Drawer' a graphic cookbook by Helen Ashley.
I don't have the book but I have been collecting the recipes from the back of the Telegraph magazine every week (the book is on my wish list). It is such a wonderful idea, presenting recipes in a simple comic book way, combining graphic design with cooking. They are simple and easy to follow. I made Chili Con Carne the other day using one of her recipes and it was wonderful.


Tuesday, May 15, 2012

Thai Carrot Salad


A really nice, light recipe. A word of warning tho, wear gloves when handling the chili peppers!
I didn't use the rice noodles as I didn't have any, so I used egg noodles instead, I also didn't use the peanuts and only added about a teaspoon of sugar, but really I don't think it needs the sugar as the lime and chili really dominate the taste.
I doubled everything so it would last the week, also if you let it sit over night the flavours are much stronger.

What you will need:

4 tbsp Thai fish sauce
2 limes, juiced
1 tbsp palm or soft brown sugar
2 shallots, finely shredded
2 red chillies, finely shredded
3 large carrots, finely shredded o grated
2x50g bundles, rice vermicelli noodles, soaked according to pack instructions
A small bunch mint, chopped
a handful of peanuts, toasted and chopped


Method:

1. Put the fish sauce, lime juice, sugar, shallots and chillies in a large bowl and leave to sit for five minutes

2. Add the carrots, drained noodles and mint and toss everything together. Tope with peanuts.


Nutrion Per Serving:

192 calories              6.2g protein
35.3g carbs               3.8g fat
0.6g sat fat                3.4g fiber
3.01g salt

Monday, May 14, 2012

Spicey Falaffels


Really simple recipe, which can be stuffed into pitas with salad or served with cous cous and hummus. I just had them with a small salad. It serves six, one per person, but I made nine small ones as I wanted plenty for leftovers.
A bit dry, only because I baked them rather than fried them, but soy sauce or sweet chili can solve that problem!

What you will need:

2 tbsp sunflower or vegetable oil
(I used olive oil, and would prefer it over the others as veg oil can taste a bit off sometimes)
1 small onion finely chopped
1 garlic clove, crushed
400g can chickpeas, washed and drained
1tsp ground cumin
1 tsp ground coriander
handful of parsley, chopped or 1tsp dried mixed herbs
1 egg, beaten

Method;


1. Hat a tbsp of oil in a large pan, then fry the onion and garlic over a low heat for 5 minutes until softened.

2. Tip into a large mixing bowl with the chickpeas and spices.

3. Then mash together with a fork or a potato masher until the chickpeas are totally broken down.

4. Stir in the parsley or dried herbs, with seasoning to taste.

5. Add the egg, then squish the mixture together with your hand, or fork.

6. Mould the mix into 6/12 balls, then flatten into patties.

7. Lightly oil a baking tray and place patties in oven at gas mark 4 for 25 minutes.
Or, heat the remaining oil in the pan, then fry the felafel's on a medium heat for 3 minutes on each side, until golden brown and firm.
These can crumble and break that's why I would recommend baking them, plus it is better for you!
8. Serve hot or cold

Nutrition Per Serving

105 calories          5 g protein
8g carbs                6g fat
1g sat fat               2g fiber
1g sugar                .27 salt

Wednesday, May 9, 2012

Aubergine Melts


Aubergine Melts

Really good and simple recipe ready in twenty-five minutes. Serves 4 or two very hungry people, it also depends how big your aubergines are. Ours were quit small and because we were quit hungry we managed one and a half each!
Very filling, although it is a vegetarian dish, it will suit meat lovers as the aubergines are almost meat like. You can eat the skins also.
I would recommend eating this with some light soy sauce and of course sweet chili.
The recipe recommends it is served with salad and/or cous cous.

What you will need;

3 tbsp olive oil
2 aubergines, halved length ways
4 tomatoes
(or more depending on the size of your aubergines)
1x 150g ball mozzarella, drained and sliced
(I used two balls)
Handful of basil leaves or dried basil


Preheat the oven to 200c/fan 180c/gas mark 6.

Method;

1. Drizzle the oil over the aubergines and bake in the oven for 25 minutes until softened.

2. Meanwhile slice the tomatoes and the mozzarella.

3. When aubergines are cooked arrange the tomatoes then the mozzarella on top of the aubergines.
(sprinkled basil on top, you can add garlic or whatever you like for taste)

4. Return to the oven for another 5 minutes or until the cheese has melted.

5. Scatter over some basil leaves.
(I added the dried basil before I put it back in the oven to melt the cheese has it really added to the flavor.)

Nutrition Per Serving:

213 calories        6g saturated fat
9g protein           4 g fiber
7g carbs              6g sugar
17g fat                0.41g salt


Wednesday, April 25, 2012

Chicken Pot Pie


This recipe is delicious! But make sure you add the mustard and lemon, it is essential! I don't care if you don't like mustard, personally I cant stand it, put without it this recipe just wont cut it!
There is a bit of work in this one, and I usually make it over two days. Basically cooking the vegetables and the sauce and then making the actual pie the next day. This one was made in a day as it was Sunday!
This recipe serves two hungry or four not so hungry people. I would recommend adding an extra carrot and a leek and doubling the sauce.

What you will need;

250g (9oz) puff pastry
(you can make your own, if you are brave, but I would by the ready made stuff, Jus-Roll is really good!)
2-3 small carrots
1-2 leeks
250ml (9fl oz) chicken stock
20g (3/4 oz) butter
20g (3/4 oz) flour
leaves from 2 sprigs tarragon
(I have yet to use tarragon, as I cant get a hold of it, and It hasn't started to grow in the garden yet)
1 tsp Dijon mustard
A good squeeze of lemon
250g (9oz) cooked chicken, cut into chunks
1 small egg lightly beaten


Preheat the oven to 200 degrees C/400 degrees F/ gas mark 6

For the Filling:

1. Cut the carrots into chunks on the diagonal.
Remove the coarser leaves from the leeks and trim off the base and the dark green bit at the top, Cut into rings about 2cm thick Wash thoroughly in running water and drain.

2. Put both vegetables in a saucepan and add the stock.

3. Bring to a boil then turn down to a simmer until tender.


4. Drain off the stock into a measuring jug. (you should have about 25-50ml left, add enough milk to bring up to 250ml (9fl oz).
More than likely you will have a lot more stock than you need. I recommend doubling the sauce so save whats left so you can make extra.

5. Melt the butter in a medium saucepan and add the flour.
I used a bit more flour than recommended. If you have made white sauce before than you will have more of an idea its all down to instinct. Don't let it burn but cook its enough that its stuck together and golden.

6. Stir around over a medium heat then take off the heat and start to stir in the milk mixture, adding a little at a time and stirring constantly to create a smooth sauce.


7. Put the pan back on the heat and bring to the boil, stirring all the time.

8. Turn down to a simmer and add the tarragon, mustard, lemon juice, salt and pepper.

9. Add the chicken and the cooked vegetables and carefully combine.


10. Check for seasoning, you may want to add a little bit more mustard.

11. Heat everything through then leave it to cool a little.

The pastry;

In this recipe they assume you are making your own pastry, but like I said before I would recommend buying the jus-roll pastry. It makes life alot easier! Also I made one large pie, they made several small ones. Anyway I will include what they said for the pastry then I will do my own.

Pastry recipe;

1. Prepare the pastry lids first so they can chill.

2. Roll out the pastry thinly on a lightly floured surface and cut out rounds 2.5cm (1in) larger than the dishes you are going to use.

3. Flour these lightly and put them on a baking sheet.

4. Roll out the trimmings to make strips about 1cm (1/2in) wide to fit round the top of each dish.

5. Make leaves out of the rest of the trimmings.

6. Put all these on a baking sheet and place in the coldest bit of the fridge (or briefly in the freezer).

My Jus-Roll Pastry;

Basically you want to follow the same measurements as above.

1. Roll out you pastry on a lightly floured surface.

2. Cut out the shape of you lit, make sure its larger than your dish. You can always trim it down.

3. Roll out thin strips of pastry and attach them to the lip of the dish by brushing water on the back of them.


4. Brush the surface of the strips with water and place your rolled our pastry on top. Trimming it down to size while leaving enough around the edge to allow shrinkage.
5. Decorate it as you like with the extra pastry. If I were you, any extra pastry left over, roll them in to balls or squares and bake them with the pie.Yum! Pastry biscuits/balls!


6. Bake in the oven at 200c/400f/gas mark 6 for 20 minutes until piping hot, puffed up and golden. Serve immediately! Really good with sweet chili sauce. But then everything tastes great with sweet chili!


The finished product! Yum!!!
This is one of my favorite recipes so far, I would highly recommend it!

Tuesday, April 17, 2012

Open Pie with Roasted Peppers and Aubergines (Coca de Recapte)

Another Recipe that's requires a bit of time. The dough needs to rise for two hours and the veg needs to cook for at least 45 minutes.
I started just after 3pm and didn't get the final product in the oven until after 7pm. I wasn't cooking the whole time, but the preparation took a bit of time also. After I had finished making the dough, I put the vegetables in the oven, unless you prepare this the day before, I wouldn't recommend waiting til the dough has risen to continue with the next steps, but I suppose it depends on how much time you have on your hands!
I'm not sure how successful this recipe turned out, for me it tasted very good, but looked nothing like the original recipe picture. I did however do a bit of research, and found that mine looks like everybody Else's on the world wide web, besides the fact that mine failed to rise around the edges, and brown. This may be because the bread recipe I used was gluten free, or perhaps I failed to mix it properly, since most of the mixing and kneading was done by the good old Kenwood mixer, rather than by hand.....
You could really taste the oil, in the bread, without it being to overwhelming. But once you got stuck in it was most enjoyable!


This recipe serves 8 as a starter.

What you need for the pastry dough:

400g strong white bread flour
2 tbsp olive oil, plus a little extra
2tsp dried active yeast (or 7g 'easy bake' yeast)
1/4 tsp sugar
tsp salt


Pasty Dough Recipe;

1. Put the flour in a large bowl, sprinkle over a teaspoon of salt and add the oil.

2. Put the dried yeast in a glass with the sugar, add about 100ml warm water and stir well.
      

3.When it begins to froth, pour it into the flour, pour it into the flour, then gradually pour in a further 100ml or so of warm water, stirring it in first with a fork, then with your hand.
         'When I did this it did not froth, it just bubbled rather unhappily in the center. Maybe my water wasn't hot enough? After a while of waiting, I just made do with my sad bubbles and added it to the mixture..' 'I didn't uses my hand, I cheated and used the Kenwood..'
4. Add just enough water to have a soft ball of dough that sticks together.

5. Knead for ten minutes until the dough is smooth and elastic, adding water by the tablespoon if too dry and a little flour if to sticky.
          'I found I had to add A LOT of flour, I couldn't touch the dough without it sticking to my fingers.'

6. Pour about half a tablespoon of oil into the bowl and turn the dough over in the oil to coat it well so that a dry crust does not form when it rises.

7. Cover the bowl with clingfilm and leave the dough to rise in a warm place for one to two hours until doubled in volume.

For the topping;

2 aubergines (about 500g)
I used 3 aubergines, as 3 came in the packet and I didn't want to waste it..
3 red peppers
Or yellow, or green....
5 tbsp olive oil
2 large onions, peeled and chopped
5 tbsp olive oil
2 tomatoes (about 200g), peeled and chopped
1 tsp sugar

Topping Recipe;

Aubergines
1. Put the aubergines and peppers on a sheet of foil on a baking tray.

Peppers!

2. Prick the aubergines in a few places with a pointed knife and put the tray in an oven preheated to 180C/gas mark 4, for 45 minutes or longer.

3. Take the peppers out when they are soft and blistered, put them in one or two plastic bags and seal.
        'I wasn't sure why they asked you to put it into a plastic bag at first, but I think its because it causes the skin to loosen making them easier to peel.'


4. Leave for about 10 minutes, then peel them, remove the seeds and cut them into small squares of about 1.5cm.

The peppers were very easy to peel. It was a lot like cutting liver...

5. Take the aubergines out of the oven when they feel soft.

6. Peel the aubergines, put them in a colander and press slightly to let the juices drain away.
  'Give them a really good squeeze as the juices are very bitter.'


7. Then cut them into small sized pieces.

8. Mix the aubergines and the peppers together, dress with salt and and two tablespoon's of the oil.


For the sauce;

1. Fry the onions in the remaining three tablespoons of oil in a frying-pan over a low heat, until soft, cover to begin with and stirring often.

2. Add the tomatoes, sugar and some salt and cook over a medium high heat, stirring occasionally, until most of the liquid has evaporated.
   'My onion's and tomatoes weren't very 'saucy,' they were still quit solid. At this point I was rushing a bit so I just left them as they were..

When all of the above is done and the dough has risen....

1. Punch the risen dough down, knead for a couple of minutes, and divide into two balls.

2. Roll them out thinly on a floured surface into oblongs or ovals of 28x38cm.


3. Brush two large baking sheet with oil.

4. Lift up each sheet of dough by wrapping it on the rolling pin and unwrapping it on the baking sheet.

5. Spread the onion and tomato sauce evenly over the dough, then dot with the peppers and aubergines.
My chunky sauce..
Not really dotted, more swamped with peppers and aubergines..

6. Bake both cocas in the preheated oven at 180C/gas mark 4 for about 30 minutes or until the crust around the edges is crisp and brown.

This is the final product, I cut them up into easier slices. As you can see they haven't really browned, but still good!

Wednesday, April 4, 2012

Baked Eggs


This is a very easy recipe, It will serve as many people as you like, but it is great for one.


What you will need;
1 egg
tomatoes, ham, mushrooms, est.
cheese
salt and pepper
A ramkin or small dish


You will need small dishes, or ramkins. When I made this recipe I put to many ingredients in, so there was little room for the egg, so I had to shift the contents around so the egg white had somewhere to go. Some of the yokes ended up breaking but it still tastes the same..

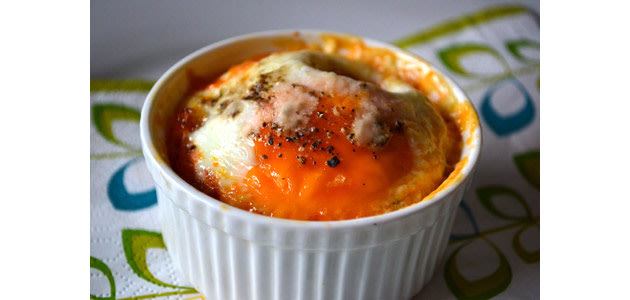
Recipe Picture

This method is a bit like coddling, (that's if you have ever coddled an egg, I haven't so I wouldn't know to compare..) but you don't use any water.

Tomato, ham and a bit of cheese with Basil
Butter a ramekin, and scatter in some chopped ham, chorizo, chopped tomato, mushrooms or whatever else you fancy. I used some ham, a bit of cheese and chopped tomatoes, I also added bit of Basil for taste but you can season it however you like.
If you're using raw chopped bacon, cook it first.


 Crack in an egg, season and sprinkle over a tiny grating of cheese.


The egg is placed on top of your ingredients, as you can see I didn't leave a lot of room for the egg. I added some salt and pepper, and a bit of cheese.

Ramkins on the baking tray before the egg was added..
Place the ramekin on a baking tray and cook in the oven for 12-15 minutes at 180°C/ Gas Mark 4 or until cooked to your liking.
Baked eggs
I know it doesn't look very attractive compared to the original recipe photo above, but as you now I added way to much filling, so some of the eggs did leak, also my baking tray is uneven, which didn't help the leakage. I don't like runny eggs, so these were left in a lot longer than 15 minutes. Also I did use tomatoes and the juice from the tomatoes makes the egg seem uncooked, just to warn you!
Either way it is rather yummy.
Its not how it looks its how it tastes that's important!

Tuesday, March 20, 2012

'Half Moon Breads, stuffed with goats chees, prosciutto, basil and olives

So, as you know there are more ways to creating art than, just creating an image, whether its 2D or 3D, there is also cooking.
I have really started to enjoy cooking, even though I am someone who is very wary of what I eat and how much, est. but I am cooking for two,so nothing goes to waste.
So I have decided to add these cooking adventures to my blog, using recipes out of the back of the Sunday Telegraph Magazine, or where ever I may find them. They will not be frequent, if one is lucky maybe once a fortnight. Its something I had already started and I regret not documenting the results, but they were so good that I am sure I will be doing them again. The pictures of my food may not be great but I will try an include pictures from the actual magazine as well.

A picture from the magazine of the half moons being prepared.


This  recipe serves 4, The dough makes 4 half moon breads, but I would recommend making eight as they are quit big.

What you will need:

1 quantity of flat bread, allowed to rise for an hour
4 heaped tbsp of fresh goats cheese
4 slices of prosciutto
8 olives, pitted and sliced.
(the recipe calls for 8 olives, but I added a lot more cutting them into quarters, it depends on you.)
8 basil leaves

Flat bread Recipe:

What you will need:

1 egg
100ml Olive oil
15g (2 sachets) easy blend dry yeast
500g plain white flour or Italian '00' flour (I used the plain)
6 tbsp chopped coriander

1. Beat together the egg, olive oil, and 200ml of luke warm water

2. Put the yeast, a tsp of salt and the flour into a large bowl or mixer, and slowly add the liquid. (it really helps if you have a proper mixer, I have my mums old super chef, which only has one speed, super fast, it has a special claw for bread, it really makes life alot easier!)

3. Knead for up to 10 minutes until the dough is very smooth and elastic.

4. Place back in the bowl, cover with clingfilm and leave in a draught free place for one to two hours, until it is double in size.
                                                               *  *  *
5. Preheat the oven to 220C/gas mark 7.

6. Place the dough on a well floured surface and kneed the fresh coriander into the dough by folding, turning, and refolding until the herbs are well distributed.

**At this point you can starting rolling out the dough for the half moons, (see below) but I will give you the rest of the recipe in case you want to make actual flat bread!******

7. Divide into 12 pieces and stretch each into a slim oval.
8. Lay them on an oiled baking sheet and leave to rise for 20 minutes.
9. Bake for eight minutes until puffed and slightly coloured.


Half Moon Recipe:

1. For each half moon take a piece of dough the size of a squash ball and roll or stretch into a circle measuring 15cm in diameter.

2. Place on a floured board, and put a tablespoon of goats cheese, a slice of prosciutto, a few olive slices and a couple of basil leaves in one half of the disc.
(You don't have to be true to the recipe when adding the fillings, I always tend to add a bit more. Also I didn't have whole Basil leaves, but the chopped and bottled stuff works just as good, just sprinkle on as mush as you think, but don't be timid about it!)

3. Fold the other half over to make a semi-circle, and press down firmly to seal the sides together.
It is important that the parcel does not leak, so mend any tears by pinching the edges together.

4. Brush with oil and placed on an oiled baking sheet.

5 Bake for twelve minutes until and well browned.

6. For a richer and dough-nutty result, you can fry the half moon breads in a centimeter of cooking oil until golden, Either way eat warm. Although they are jolly good cold!
(I didn't fry mine, but I am pretty sure they did in the magazine, judging by the picture.)

I have to say I wasn't sure how these would taste, as I found the goats cheese quit rich, but I have to say they were excellent and very tasty. The bread really soaked up the flavour of the goats cheese.

You can see my pictures below, they are not very good quality and I will try and do better next time!


The half moon before it went into the oven. In case you didn't know that's prosciutto on the left there.


The half moon breads, straight out of the oven. As you can see they are rather big, so I would recommend making eight rather than four. Just make sure you have enough dough so when it cooks and expands the cheese can spill out!

The insides! yum!